Functionality and Maintenance: Self Watering Plant Pot
Self watering plant pot – Self-watering plant pots offer a convenient and efficient way to keep your plants thriving, even when you’re busy or away from home. Their ingenious design minimizes the need for frequent watering, reducing the risk of underwatering or overwatering, both common causes of plant distress. This section will guide you through the setup, usage, and maintenance of your self-watering pot, ensuring your plants receive the optimal care they deserve.Setting up and using a self-watering pot is surprisingly straightforward.
The process generally involves filling a reservoir with water, planting your chosen greenery, and allowing the pot’s wicking system to do the rest. The specific steps may vary slightly depending on the design of your pot, but the underlying principles remain consistent.
Setting Up a Self-Watering Pot
Begin by carefully examining your self-watering pot’s instructions. Most pots have a reservoir located at the bottom, separated from the planting area by a perforated plate or a wicking system. Fill the reservoir with water, ensuring you don’t overfill it, as this can lead to root rot. The water level should typically be indicated by a fill line or measurement markings on the reservoir.
Next, carefully place your plant into the upper planting chamber, ensuring the roots are adequately spaced and the soil is appropriately moist. Some pots have a small water indicator window to monitor water levels. Regularly checking this window will help you maintain the ideal water level in the reservoir.
Proper Watering Techniques for Self-Watering Pots
While self-watering pots reduce the frequency of watering, they don’t eliminate the need for it entirely. The frequency of refilling the reservoir depends on factors such as plant type, pot size, environmental conditions (temperature and humidity), and the type of soil used. Overwatering can lead to root rot and fungal diseases, while underwatering can cause wilting and stunted growth.
The goal is to maintain consistently moist but not soggy soil. Avoid letting the reservoir completely dry out; aim to refill it before the indicator shows an extremely low water level. Regularly checking the soil moisture with your finger is a good practice. If the top inch of soil feels dry, it may be time to add more water to the reservoir.
Maintenance of Self-Watering Pots
Regular maintenance is crucial for the longevity and efficiency of your self-watering pot. Different pot types may require slightly different cleaning procedures. For example, pots with removable reservoirs are easier to clean than those with integrated reservoirs. Regardless of the design, periodic cleaning is necessary to prevent mineral buildup and mold growth.
Cleaning Procedures
To clean your self-watering pot, begin by emptying the reservoir and removing any excess soil or debris from the planting chamber. Wash both the reservoir and the planting chamber with warm soapy water, ensuring you reach all corners and crevices. Thoroughly rinse with clean water to remove any soap residue. For stubborn mineral deposits, you can soak the affected areas in a solution of white vinegar and water.
Allow all parts to dry completely before reassembling and refilling the reservoir.
Addressing Potential Issues, Self watering plant pot
Mineral buildup is a common problem in self-watering pots, especially in areas with hard water. This buildup can restrict water flow and affect the pot’s efficiency. Regular cleaning, as described above, helps prevent this. Mold can also develop if the soil is consistently too wet or if the pot is not cleaned regularly. Proper watering techniques and regular cleaning can minimize the risk of mold growth.
If mold does appear, remove it immediately and clean the pot thoroughly. If you notice any signs of root rot (dark, mushy roots), it’s crucial to repot your plant in fresh soil and a clean pot.
Common Queries
How often should I check the water reservoir in my self-watering pot?
Check the reservoir at least once a week, or more frequently during hot, dry periods. The frequency depends on the size of the reservoir, the plant’s water needs, and environmental conditions.
Can I use any type of potting mix in a self-watering pot?
While most potting mixes work, avoid mixes that are too dense or retain excessive moisture, as this can lead to root rot. A well-draining mix is essential.
What should I do if I see mold growing in my self-watering pot?
Clean the reservoir and the pot thoroughly with a mild bleach solution (1 part bleach to 9 parts water). Rinse well and allow to dry completely before refilling and replanting.
Can I use tap water in my self-watering pot?
Generally, yes, but it’s best to let tap water sit out for 24 hours to allow chlorine to dissipate. Using filtered water is even better.
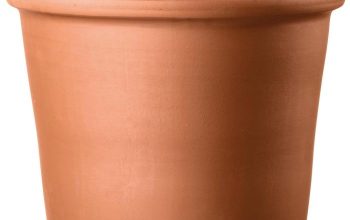
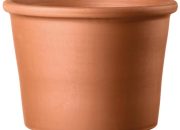
Self-watering plant pots offer effortless plant care, perfect for busy lifestyles. Imagine the convenience amplified when using these systems with larger plants, housed in stunning, statement pieces like the huge terracotta plant pots which add a touch of rustic elegance. The self-watering feature ensures your larger plants receive consistent moisture, regardless of your schedule, maximizing their growth potential within these beautiful containers.

